
Before adding a case to AquaPedia, you should look at what others have added.
Choose a case, any case, and click on the “Edit” tab that appears at the top right hand side of your screen. You might want to open it in a new tab so that you can see the “Read” view and the “Edit View”

The tabs that go across the top of the editing area “Case Description”, “Issues and Stakeholders”, and so on are the topic headings that appear on the case when you view it. “Case Review” is the only tab allows any user to “flag” the case for completeness etc. You can even flag a case that you create to make sure others know that you understand that certain parts aren’t final yet.
Click between the different tabs, and maybe look at the article itself (the “Read” view) in another browser window to get an idea of how they relate to each other.
Each section is pretty self explanatory, and everything is optional. Once you start your case, don’t feel like you need to complete every section of a case if you don’t have the right information to do so, or if you don’t think it applies to your case.
The Dreaded ASI (Analysis, Synthesis and Insights)
Like most Wikis, users can edit almost any content. ASIs are protected articles that can only be edited by the original author, a site Editor or Administrator. This exists so that different people can add their own insights to different cases. It also allows an author to share their work without the fear that someone else may edit or change it. This also is the place for opinions: in disputes, sometimes the same facts of a case can add up in different ways to people with different perspectives.
Sometimes this is a hard topic for students: they aren’t quite sure what to do with this section. If your case is mostly background: you might not need it at all. If your case is mostly analysis: you need to use this section.
Use an ASI article to share whatever knowledge and perspective you have on a case that you do not want anyone else to be able to edit, revise or change. It often takes the form of an essay that references the case, or what would be a synthesis section in a journal article.
Complete you case first, then start the ASI, so that you can link it to your case, which happens in the editing tab for an ASI. Without that link, it won’t appear in your case. Your ASI’s title will appear within your case. It just needs to be something unique — you won’t be able to create one with the exact same title as any other.
Keeping it Simple
This site uses wikitext, which is a markup language for formatting text. You can create a case that looks great without using any of it at all. However, if you want to add emphasis and headings and blockquotes to paragraph text you can refer to Wikipedia’s guide on the topic, and also use the “Advanced” bar that appears in sections where you can add paragraph-style responses.
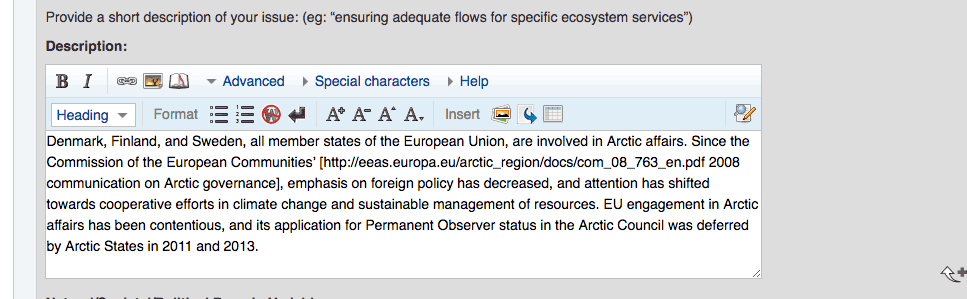
this is a paragraph-style text box with “advanced” editing option to insert wikitext formatting. This example is from the “Issues and Stakeholders” tab in the Arctic Ocean Ice Meltdown case study.
Remember it is a Wiki for a Reason
If you are producing a case as part of a class requirement: make sure you meet your course requirements and produce the paper that you need to produce for that class. Your instructor probably shared a Word Document that can be used to prepare an AquaPedia case: use it. You’ll see that the items there mostly match cut-and-paste style what you would need to add to case, section-by-section.
Most cases aren’t complete: because there are many ways to view and understand complex water problems, and new events are unfolding all the time. Do your best, but don’t worry about a case that is a little uneven or far from a complete document.
